It is impossible to decrease EBS volume size. When you have 100GB EBS and you decide to modify it into 30GB you will get error : The size of a volume can only be increased, not decreased. That’s terrible …
But don’t worry. We could also do the trick to decrease EBS volume size. However, it is not easy task as it is not a straightforward. Here is the trick :
- Snapshot the volume
- Create a new smaller EBS volume
- Attach the new volume
- Format the new volume
- Mount the new volume
- Copy data from old volume to the new volume
- Prepare the new volume
- Detach and unmount old volume
Getting started
Let’s exercise.
Assume we have :
- Instance named my-instance in ap-southeast-1a zone
- 100GB EBS volume size named old-volume
- We wish to decrease into 30GB and name it new-volume
We would need to shutdown the instance to prevent inconsistencies.
Snapshot the volume
You could read this story in order to snapshot the EBS volume.
Create a new smaller EBS volume
- Make sure instance is shutdown
- Go to Elastic Block Store Volumes
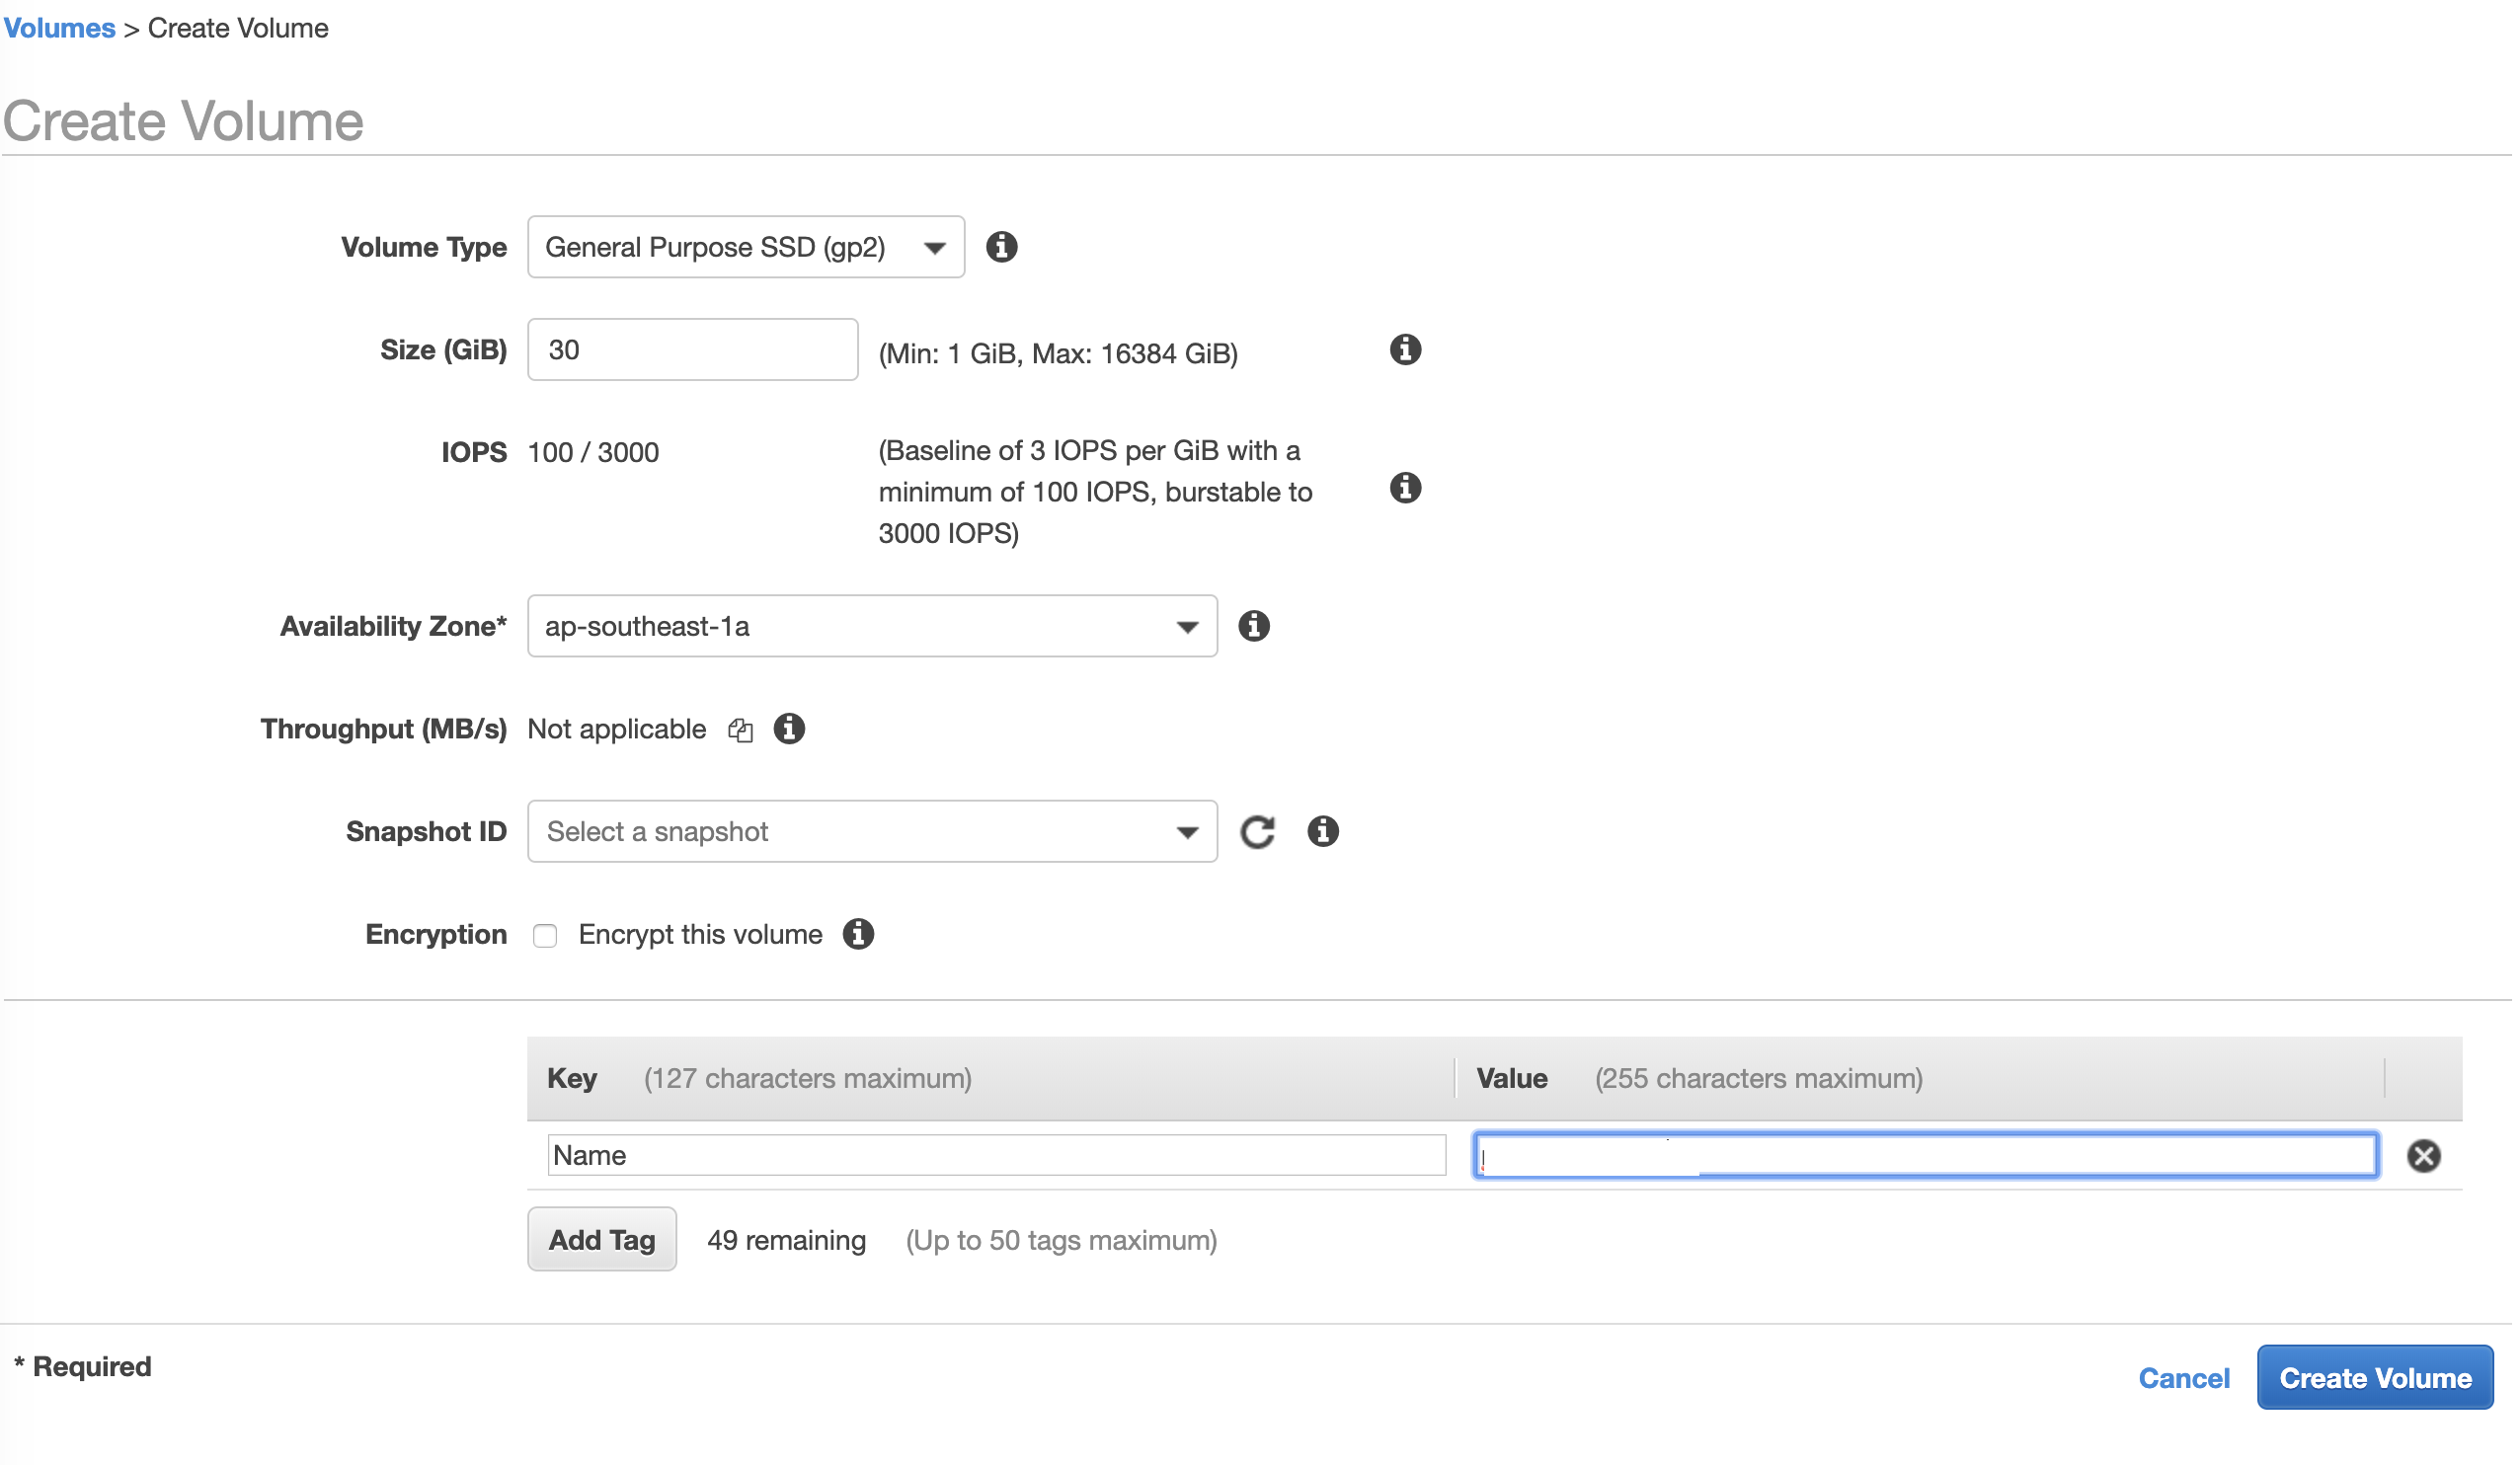
- Click Create Volume
- Choose the same volume type same with your old volume
- Enter your desired size; In our case 30.
- Choose availability zone; The volume will be available to instance in the same availability zone, which is ap-southeast-1a .
- Add tag with Key : Name and value : new-volume

Attach the new volume
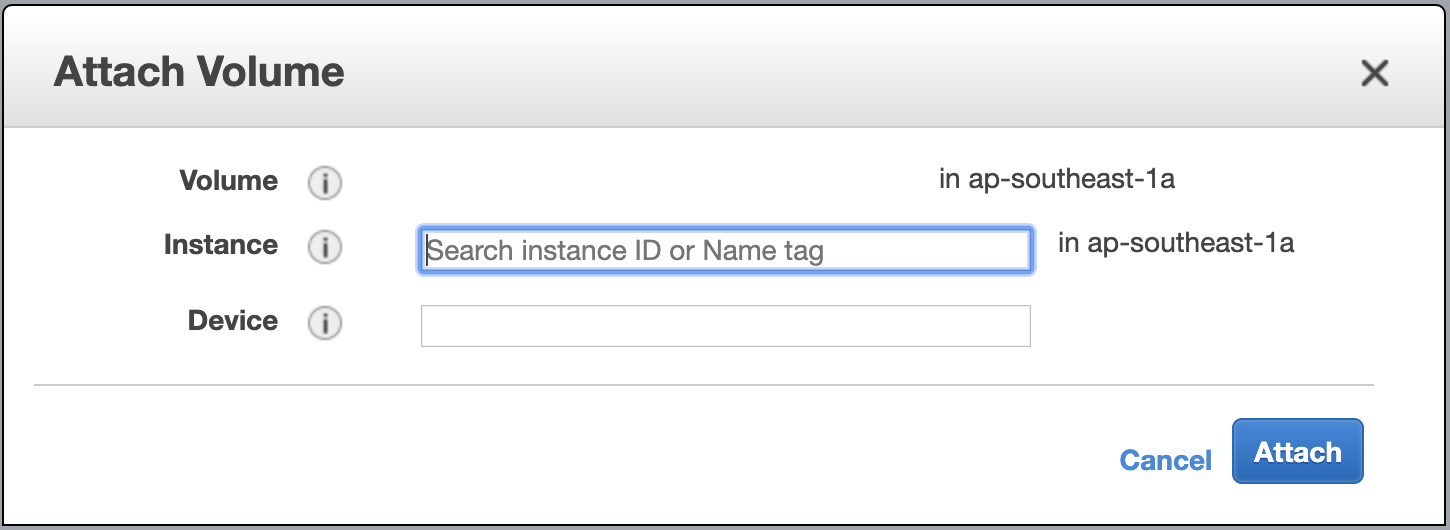
- Right click on the new volume.
- Click Attach Volume.
- Choose instance name my-instance .
- Click Attach.
We could start the instance and login to SSH. List all available volume with lsblk. The new volume is in /dev/xvdf.

Format the new volume
- Check whether the volume have any data or not using command sudo file -s /dev/xvdf .
- If it is displaying /dev/xvdf: data, it means the volume is empty. We could format the volume.
- If it is displaying other than above output, it means the volume have data. DO NOT format the volume if you saw this output.
- Format the volume using command sudo mkfs -t ext4 /dev/xvdf .

Mount the new volume
- Create directory to mount using command sudo mkdir /mnt/new-volume .
- Mount new volume into directory using command sudo mount /dev/xvdf /mnt/new-volume .
- Check volume with command df -h; The new volume should be mounted now.

Copy data from old volume to the new volume
- Use rysnc to copy from old volume to the new volume sudo rsync -axv / /mnt/new-volume/.
- Relax and wait until it’s finished. Get a coffee!
Prepare new volume
- Install grub on new-volume using command sudo grub-install –root-directory=/mnt/new-volume/ –force /dev/xvdf .
- Unmount new-volume sudo umount /mnt/new-volume .
- Check UUID using command blkid .
- Copy UUID from /dev/xvda1 (paste anywhere to backup this UUID); This is your old UUID.
- Use tune2fs to replace UUID sudo tune2fs -U COPIED_UUID /dev/xvdf; COPIED_UUID is the string value from point 4.
- Check the system label from old-volume using command sudo e2label /dev/xvda1 ; It will display string like cloudimg-rootfs .
- Replace new-volume label with old-volume label using command sudo e2label /dev/xvdf cloudimg-rootfs .
- We can logout SSH now.
Detach old volume
- Stop instance my-instance
- Detach old-volume
- Detach new-volume
- Attach new-volume to /dev/sda1
- Start instance my-instance
After we finish all steps above, we could check our instance by login into SSH.
We could delete old-volume and snapshot-old-volume if our system works correctly. I prefer to keep snapshot for a week / month before deleting it.

Conclusion
We cannot straightforward decreasing the size of EBS volume. All we can do is to create a new smaller volume.
Hope it’s help!
checkout origin content at https://medium.com/@m.yunan.helmy/decrease-the-size-of-ebs-volume-in-your-ec2-instance-ea326e951bce


