
When I want to deploy my last changes to my VPS, I always connect to my server with ssh and pull the project, install last packages, run migrations, and so on. I’m a lazy person to repeat this process over and over. Auto deployment comes to rescue. So whenever I make changes and push it, I want my project to be up and running with the last changes there too. I have so many options to accomplish this task including Jenkins, TeamCity, CircleCi and others. But my project hosted in GitLab and I have not so many space to install hundreds of megabytes of tools in my VPS.
We will setup on Ubuntu 20.04. Steps we should finish are:
- Create deployer user
- Install gitlab runner
- Register new gitlab runner
- Create .gitlab-ci.yml file
Create deployer user
- Firs of all, ssh into your remote server:
ssh root@your_ip_address
- Create new user
sudo adduser deployer      # Fill in user info and password
sudo usermod -g www-data deployer # Assign group www-data(primary)
After this you login to this user in order to create ssh keys.
ssh deployer@your_ip_address
After successfull login, generate ssh keys and copy path to private key. In our case it may be something like this:
ssh-keygen
cat /home/deployer/.ssh/id_rsa #show private key in terminal, and copy it using mouse
Install gitlab runner
In GitLab, Runners run the jobs that you define in .gitlab-ci.yml. A Runner can be a virtual machine, a VPS, a bare-metal machine, a docker container or even a cluster of containers. GitLab and the Runners communicate through an API, so the only requirement is that the Runner’s machine has network access to the GitLab server.
To install the Runner:
- SSH into your remote server
ssh root@your_ip_address
- Add GitLab’s official repository:
curl -L https://packages.gitlab.com/install/repositories/runner/gitlab-runner/script.deb.sh | sudo bash
- Install GitLab Runner
sudo apt-get install gitlab-runner
Register new gitlab runner
sudo gitlab-runner register
This command will ask you different questions:
Please enter the gitlab-ci coordinator URL (e.g. https://gitlab.com/):
If you are hosting your repository in your private repository in gitlab just enter “https://gitlab.com”
Please enter the gitlab-ci token for this runner:
There are three types of runners shared, specific and group. More on runners https://docs.gitlab.com/ee/ci/runners/. I choose specific runner when registering, so I need it’s token to register on server. In order to get token for specific user. Go to your project and go to Settings > CI/CD to obtain the token. This window is like below:
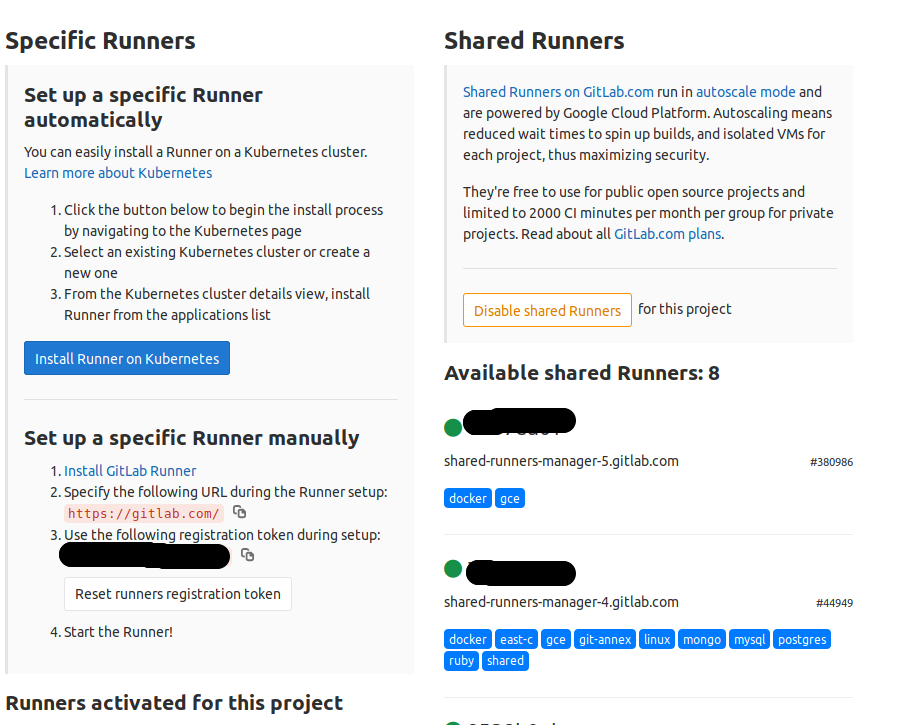
Click Disable shared Runners. Otherwise it will run shared preference by default.
Enter the token in step 3 left side.
Please enter the gitlab-ci description for this runner:
Description for this project, for example, runner for my project.
Please enter the gitlab-ci tags for this runner (comma separated):
Any tag that you want to put on this runner. You may skip it.
Please enter the executor: docker, docker-ssh, parallels, ssh, virtualbox, kubernetes, shell, docker+machine, docker-ssh+machine:
Type ssh in order to select ssh.
Please enter the SSH server address (e.g. my.server.com):
Type in your server address or ip address.
Please enter the SSH server port (e.g. 22):
You may skip this one too, if you want.
Please enter the SSH user (e.g. root):
Type in previously created user name deployer.
Please enter the SSH password (e.g. docker.io):
Enter the password you chose, when creating deployer user.
Please enter path to SSH identity file (e.g. /home/user/.ssh/id_rsa):
Enter the path to a ssh private key we created above (/home/deployer/.ssh/id_rsa).
After all these questions you will get below message, if you did everything right.
Runner registered successfully. Feel free to start it, but if it's running already the config should be automatically reloaded!
After successfull registration of your, you will see our new specific token added under Specific Tokens on the left side:

Create .gitlab-ci.yml file
GitLab CI/CD pipelines are configured using a YAML file called .gitlab-ci.yml within each project.
The .gitlab-ci.yml file defines the structure and order of the pipelines and determines:
What to execute using GitLab Runner.
What decisions to make when specific conditions are encountered. For example, when a process succeeds or fails.
If you need more information please refer to this link .
Checkout to a develop branch. Fill out .env.example with necessary information according to your database and other needs.
Now create a file with the name .gitlab-ci.yml. Copy and paste following text in it and don’t forget to replace {your-project-name} with your project name. If you place your projects other than /var/www/html/, replace it with path to your own project.
before_script:
  - echo "Before script"
  - cd /var/www/html/{your-project-name} #your project path
building:
  stage: build
  script:
    - git reset --hard
    - git pull origin develop
    - composer install
    - cp .env.example .env
    - php artisan key:generate
    - php artisan migrate --seed
    - php artisan cache:clear
    - php artisan config:clear
    - php artisan storage:link
    - sudo chown -R deployer:www-data /var/www/html/{your-project-name}/
    - find /var/www/html/{your-project-name} -type f -exec chmod 664 {} \;
    - find /var/www/html/{your-project-name} -type d -exec chmod 775 {} \;
    - chgrp -R www-data storage bootstrap/cache
    - chmod -R ug+rwx storage bootstrap/cache
testing:
  stage: test
  script:
    - php ./vendor/bin/phpunit
deploying:
  stage: deploy
  script:
    - echo "Deployed"
    - php artisan queue:restart #if you use queue
This is very simple example of CI CD configuration you are free to change it according to your needs. Script has three stages and one before_script. Before script always run before each stage, i.e. building, testing, deploying. Runner runs first building stage, second testing adn finally deploying.
After you add and push this file, pipeline starts to deploy automatically. Go to CI/CD >Pipelines on your project repository left side panel. Something like these:
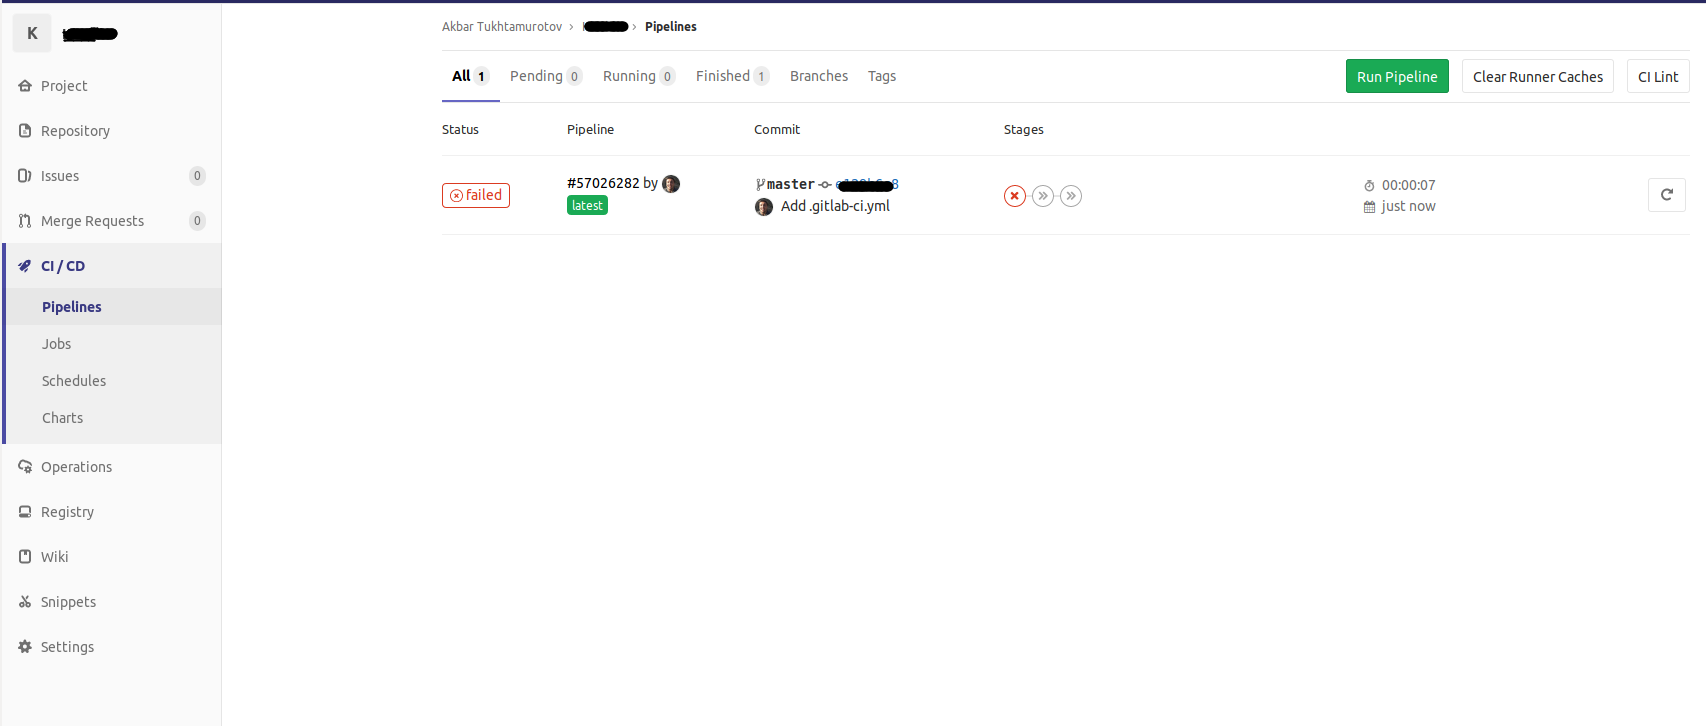
But it is failed. Hit that red failed button and you will go to following page:
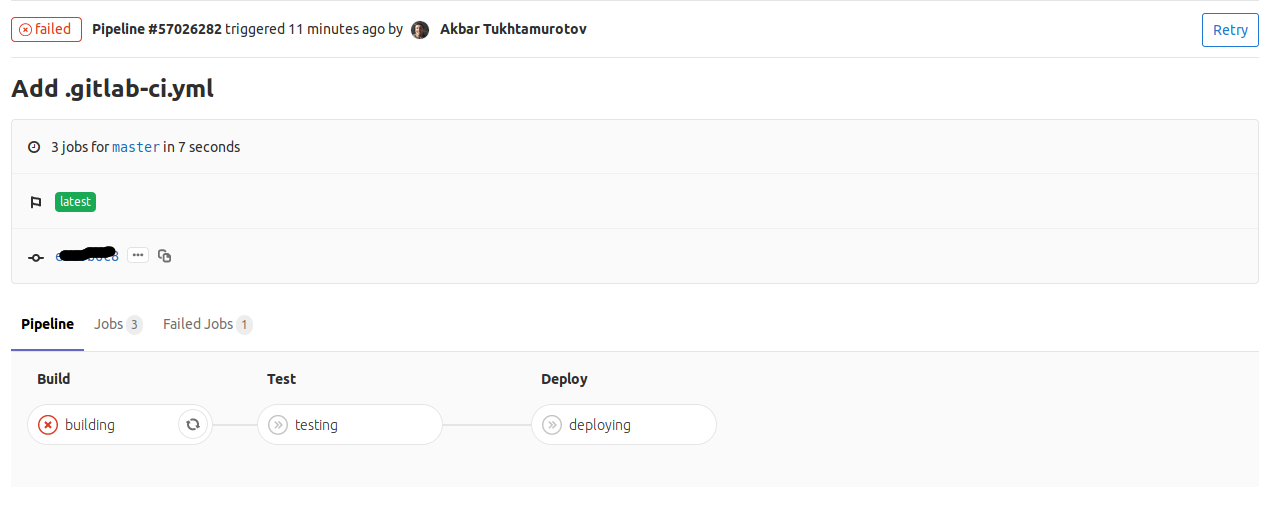
According to above picture, fail is on building stage. Click the building button with red circle x on it. Now you are on the snapshot of your terminal. From here you can see what is the cause of this error.
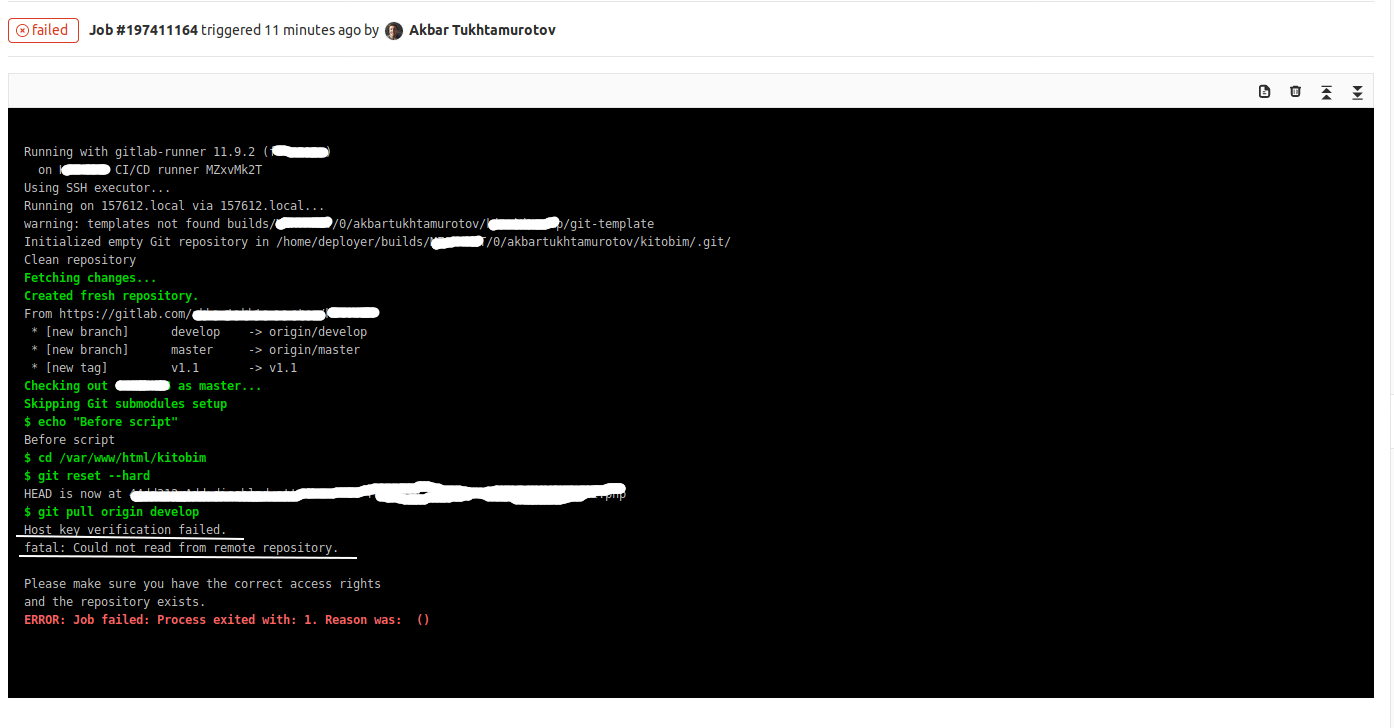
The error is after git pull develop.
Host key verification failed.
fatal: Could not read from remote repository.

Please make sure you have the correct access rights
and the repository exists.
Now you need to login your server with deployer user and pull the project manually, if it is the first time you are pulling your repository. Because authenticity of gitlab.com is not established yet.
Make sure that you add your public key into SSH keys in your settings.
In order to do this run following command:
cat /home/deployer/.ssh/id_rsa.pub
Copy the key and paste it in text area for key in your settings page.
Now go to CI/CD > Pipelines and retry pipeline.
That’s all.
Credit: https://medium.com/@akbartukhtamurotov/how-to-deploy-a-laravel-application-with-gitlab-ci-cd-b6de8aa6a611